


Create a CMS-Powered Blog
So you’ve just launched your Vue.js website, congrats! Now you want to add a blog that quickly plugs into your website and you don’t want to have to spin up a whole server just to host a Wordpress instance (or any DB-powered CMS for that matter). You want to just be able to add a few Vue.js blog components and some routes and have it all just work, right? What you’re looking for is a blog that’s powered entirely by API’s you can consume directly from your Vue.js application. This tutorial will teach you how to do just that, let’s dive in!
We’re going to quickly build a CMS-powered blog with Vue.js. It uses ButterCMS, an API-first CMS that lets you manage content using the ButterCMS dashboard and integrate our content API into your Vue.js app. You can use ButterCMS for new or existing Vue.js projects.

Install
Run this in your commandline:
npm install buttercms --save
Butter can also be loaded using a CDN:
<script src="https://cdnjs.buttercms.com/buttercms-1.1.0.min.js"></script>
Quickstart
Set your API token:
var butter = require('buttercms')('your_api_token');
Using ES6:
import Butter from 'buttercms'; |
Using CDN:
<script src="https://cdnjs.buttercms.com/buttercms-1.1.0.min.js"></script> |
Import this file into any component you want to use ButterCMS. Then from the console run:
butter.post.list({page: 1, page_size: 10}).then(function(response) { |
This API request fetches your blog posts. Your account comes with one example post which you’ll see in the response.
Display posts
To display posts we create a /blog route (using Vue Router) in our app and fetch blog posts from the Butter API, as well as a /blog/:slug route to handle individual posts.
See the ButterCMS API reference for additional options such as filtering by category or author. The response also includes some metadata we’ll use for pagination.
router/index.js:
import Vue from 'vue' |
Then create components/BlogHome.vue which will be your blog homepage that lists your most recent posts.
<script> |
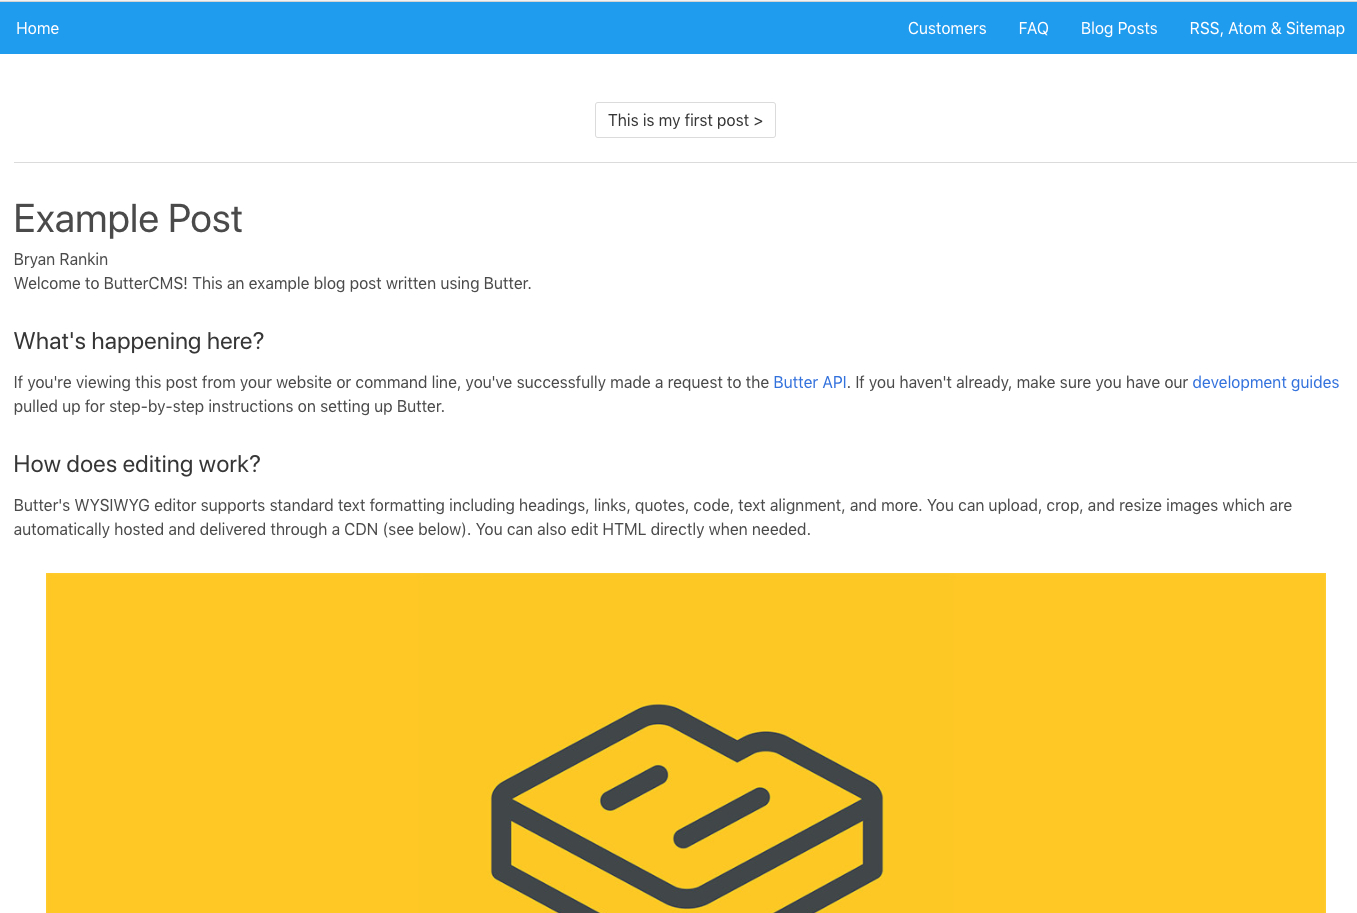
Here’s what it looks like (note we added CSS from https://bulma.io/ for quick styling):

Now create components/BlogPost.vue which will be your Blog Post page to list a single post.
<script> |
Here’s a preview:
Now our app is pulling all blog posts and we can navigate to individual posts. However, our next/previous post buttons are not working.
One thing to note when using routes with params is that when the user navigates from /blog/foo to /blog/bar, the same component instance will be reused. Since both routes render the same component, this is more efficient than destroying the old instance and then creating a new one.
Be aware, that using the component this way will mean that the lifecycle hooks of the component will not be called. Visit the Vue Router’s docs to learn more about Dynamic Route Matching
To fix this we need to watch the $route object and call getPost() when the route changes.
Updated <script> section in components/BlogPost.vue:
<script> |
Now your app has a working blog that can be updated easily in the ButterCMS dashboard.
Categories, Tags, and Authors
Use Butter’s APIs for categories, tags, and authors to feature and filter content on your blog.
See the ButterCMS API reference for more information about these objects:
Here’s an example of listing all categories and getting posts by category. Call these methods on the created() lifecycle hook:
methods: { |
Alternative Patterns
An alternative pattern to consider, especially if you prefer writing only in Markdown, is using something like Nuxtent. Nuxtent allows you to use Vue Component inside of Markdown files. This approach would be akin to a static site approach (i.e. Jekyll) where you compose your blog posts in Markdown files. Nuxtent adds a nice integration between Vue.js and Markdown allowing you to live in a 100% Vue.js world.
Wrap up
That’s it! You now have a fully functional CMS-powered blog running in your app. We hope this tutorial was helpful and made your development experience with Vue.js even more enjoyable :)